Subscribe to our Growing Gardeners YouTube Channel

Showing posts with label plants. Show all posts

Tuesday, 20 May 2014

Plant Pretty Practical

When I was studying landscaping a couple of decades ago, I spent hours in the library, poring over gardening books, and paging through landscape architecture and gardening magazines, admiring the beautiful, mainly US or UK gardens.  I couldn't wait for my chance to create similarly breathtaking gardens.
Aloe cooperi in the morning light. An easy to grow, low maintenance, beautiful plant.
My first attempts at landscaping, (that were fortunately in my mothers garden) failed dismally. The plants that I had used, either died or grew so big that we lost pets inside them. This left me wondering whether I had made the wrong choice in vocation, and I'm sure must have caused my mother to wonder whether she had just wasted a couple of years of tuition on me.

But slowly it dawned on me that the old garden maxim "right plant, right place" were words to live by. Just because something looks amazing elsewhere doesn't necessarily mean that it will suit the situation that I'm working with.

I also began to realise the deception that is inherent in almost all gardening books and magazines. It is the job of publications to sell magazines and books. The best way to do this, is to showcase beautiful gardens in all their splendour. Nobody wants to buy a magazine that shows dry, colourless gardens or gardens that have been pruned back to make way for new growth. These gardens are photographed during the 3-4 week period in an entire year, that they are at their best. In many cases, the planting that you see is entirely temporary, as annuals are planted in their abundance.  Page through any gardening magazine, and you will see the majority of the plants on display are pretty, yet short-lived annuals.  This creates an unrealistic expectation on the part of the casual observer, which when it comes time to garden leaves them frustrated or disappointed.

The garden industry through television and magazines, whilst creating a sense of excitement about the potential for beauty in your back yard, has also created a rod for its own back. I can't tell you how many people I've known through the years, that are keen to get stuck into the garden, but give up after the reality sinks in.

So before you get started with your garden, figure out whether your expectations have been over inflated, by looking around you at the best gardens in your neighbourhood. Ask yourself the following questions:
  1. Do they consistently look that way?
  2. What plants have they used?
  3. What kind of soil have they got? Is it the same as mine?
  4. Do they regularly compost and water?
  5. Have they got an irrigation system in place?
  6. What are my realistic time commitments and abilities?
Finally, do some research before you buy your plants from the nursery. Have a plan in mind, and plant for the long term. Go with a list of plants that grow well in your area, don't get suckered in by the pretty things that are flowering at the entrance to the nursery because almost by the time you get home, the flowers will be gone.

Remember, beauty is fleeting so don't just plant pretty. Be pretty practical too.

Monday, 29 April 2013

Beauty and the Brithys

There is always a price to pay for beauty...

If your name is Lily, or Aggie, or you go by the name of Amaryllis, or even Clivia, you'll know what I'm taking about. You may not have many enemies, but one of your worst foes is the beautiful-sounding Lily Borer...AKA Crinum borer, Brithys pancratii, or Amaryllis Caterpillar.

I've just finished a garden a few months ago, and having planted several types of rare bulbs, I was keen to see how they were doing. After visiting recently I was upset to find that this voracious little caterpillar was wreaking havoc on several different species of plants in the garden.
Eggs of Brithys pancratii
The moth lays its eggs, usually in clusters on the underside of the leaves.

This is why its sometimes called the Lily Borer
The larvae hatch, and bore into the soft fleshy leaves, often munching their way all the way down into the bulb.
The markings warn any potential predators that it is poisonous
I'm usually a firm believer in letting nature take its course, but sometimes something has to be done. Especially when the life of the plant is at stake.

The caterpillars usually recur regularly throughout the warmer months and less often in winter.  A pyrethroid-based insecticide sprayed onto the caterpillars usually does the trick in killing them - but it necessitates early spotting.

If I don't catch them early enough on plants like agapanthus, I will often take the drastic step of cutting back and destroying the leaves to prevent them from boring into the heart of the plant.

Monday, 8 April 2013

How To Transplant An Established Tree

I recently had a client email me asking for advice about how to move a relatively established tree. In moving any plant, there is always a risk that the plant won't survive. So of course, the best advice is to plan ahead, before you plant.
Flowers of the beautiful Halleria lucida tree

Do some research. Find out how big, how wide, how messy, and how deep the roots will grow when fully grown. The ideal is that you would never have to move a tree once it's planted...BUT that's not always possible - circumstances change, and it's not always possible to predict the future with any kind certainty.

Moving plants is always a matter of minimising risk - there are no foolproof ways of doing it. And every situation, species, and tree are different...sometimes, I think there is even an element of intuition involved.

But there are some things that you can do to reduce the risk of losing a plant that has been transplanted. Here is my reply to her, giving advice about how to move a particularly delicate tree:
  1. Dig the root ball out as deep as possible, and then slightly deeper still (basically a trench all around the tree - leaving as much soil around the roots as is possible that you can still physically move),
  2. Trim off about a third of the leaves.
  3. Leave the plant in place for about 2 weeks to let it get used to having less roots, but all the time giving the roots a little bit of extra water on the root ball as compensation.
  4. In about 2 weeks time, get your hole ready, measured and dug,
  5. Water the plant and the new location thoroughly.
  6. Trim off at least half the remaining leaves,
  7. Move the plant as quickly and carefully as possible keeping as much soil around the roots as possible.
  8. Try to position it in the same orientation that it was in its previous position.
  9. Firm the soil down around the roots and try to wash soil down into any gaps that may have inadvertently formed, (I'm not a big fan of using fertilizers when planting unless your soil is terrible, but even then I would rather use copious compost instead)
  10. And then leave it for a week or two...it doesn't have much in the way of roots so don't over water.
  11. Then wait - it may lose a few more leaves, or even a branch - losing leaves is not a big deal, but keep an eye on the stem. If you notice any rot, then you can trim off the dying branch/trunk and paint the cut section with a tree sealant.
  12. Then wait some more...sometimes I have given up hope on plants that look dead for a year or two, and then suddenly they come back...
Generally speaking, the smaller the tree the easier it will be to move. Also, if it was originally planted from a bag as opposed to self seeded, it will transplant easier. I've also found that trees transplant a lot easier in Autumn.

Weigh up the costs of losing a tree as opposed to keeping it in a place where it's not ideal - Is it really worth it?

Wednesday, 8 July 2009

Indigenous Beauties : Aloe vanbalenii

Who needs flowers when you've got this Aloe in your garden?


Aloe vanbalenii

I started these 'Indigenous Beauties' posts as a way of highlighting indigenous plants that are not very commonly used in the garden, but really should be. This plant doesn't quite fit into that category, because I've noticed that people are paying more attention to this particular Aloe...and for good reason.

Aloes are especially useful in a garden, because they mostly flower in winter when everything else is looking dry and spent. Add to this, the fact that during hot, dry periods, the foliage of many aloes will start to turn red, and you'll begin to see their unique place in a garden.

Aloe vanbalenii especially, needs very little attention, and forms dense clumps of competing plants. In times of plentiful water, or in a little shade, their foliage is a pleasing apple green, but as the heat increases, they turn a deep orange-red colour. They remind me of a bunch (what is the collective-noun?) of Octopuses jostling for their place in the sun.


Their foliage looks great in combination with yellows and other warm colours. Here they've been planted with equally hardy silvery Kleinia fulgens to fill the gaps. The silver really emphasises their colour.

They are stemless, so they don't get tall, but each plant will spread to about 1m wide and about 50cm high. Their flowers are yellow, and occasionally pink.

Friday, 17 April 2009

Lazy Landscapers

Plants are to a garden designer what words are to a writer. The larger a writer's vocabulary, the better they are able to communicate with their audience.
Unfortunately many garden designers have a very limited 'vocabulary', and they tend to only plant those few plants that they know, regardless of the conditions or what might be appropriate to the site or design.


Every landscaper or garden designer does have their palette of plants that they prefer to use, but those preferences should never be at the expense of good design.

I have been seeing a profusion of 'landscapers' lately, that seem to have a very small range of plants that they use, with the result being that all their gardens start to look the same. In some cases I've had to fix some of these gardens that have been planted up with plants that are not suited to our coastal conditions. All this because garden designers are either lazy and/or have a very limited range.

I believe that the only justifiable excuse for getting stuck using the same old plants, is when we have to revert to plants that need to be easy to look after. In these cases, when the person caring for the garden has limited skills, then its defensible to stick to safe and easy plants. The challenge then for us as landscapers is to be looking for easy-maintenance plants that we can add to our repertoir for situations like these.

How can we as garden designers not be continually learning, reading, watching and testing. We should relish the chance to try new plants, and experiment with new combinations. We should be constantly stealing from others (with our eyes of course)!

But really, how can we justify always using the same old boring plants?

Thursday, 26 February 2009

Indigenous Beauties : Dissotis princeps


Dissotis princeps
Wild Tibouchina

Dissotis princeps is a wild and princely plant. It flowers off and on from the end of Summer right through to the beginning of Spring. Its an ideal plant in wet or damp areas in the garden, it flowers for long periods, and loves full sun. Its also an easy plant to grow, it grows very fast, and can be cut right back after flowering.

Its common name is the Wild Tibouchina because it looks similar to the Tibouchina we see in established gardens, but its also known as the Royal Dissotis, because princeps means 'princely' in latin.

Its been known to be used as an aphrodisiac, and been harvested as a vegetable in difficult times.

Tuesday, 2 December 2008

Entrance Area Garden Design

I was a bit disappointed today to hear that a garden that I've been working on some designs for over the past few weeks, is not going to happen. I've been quite looking forward to building this garden.

This is the front entrance at the moment. It is at the top of a long driveway, and is quite plain, with some colourful annuals in pots to brighten things up a bit. There are probably too many different types and styles of pots - it would need something to bring everything together in this area for it to be successful. It also gets quite hot from about 10 in the morning.


The client was looking for something simple but colourful to brighten up the area. It should be low maintenance, but create a great first impression. My suggestion for the new entrance area was built around trying to create the impression of overlapping curves or waves. The first curve would consist of closely fitting rock and pebbles, and the corresponding section of pathway would have the pebbles set into a concrete screed.

The second 'layer' would step up, with a cobblestone edging along the top of the wall. The planting would have been a combination of low growing vygies (mesembryanthemum) or other colourful sun loving plants. Another option would have been to use temporary planting like annuals, so that my very busy clients could have a part to play in the garden without it being overly taxing on their time. The corresponding section of pathway would be an exposed aggregate with a white screed.


The next level up would have an urn with or without running water, and more permanent planting that would grow to about 300mm-500mm in height. Possibly Crassula or Senecio?

The final level would have planting with longer leaves for contrast. Some options would be Red Hot Poker, Bulbine, Agapanthus, or even Aloe. The last section of pathway before the white tiles would be a white concrete screed.

The planting is never final at this stage, because I like to live with the idea for a while before deciding on the planting. I usually start with the characteristics of the plants that I would like to use in an area, and then refine that to a few options before deciding on the final plant. But often even then, I sometimes have to make concessions because plants are unavailable. This then sometimes has a knock-on effect which results in having to change other plants to get the right combination.

When I get more time later this month, I'll post my ideas for the front garden, which was the area I was most excited about.

Friday, 29 August 2008

Indigenous Beauties - Rhagoda (Salt Bush)

Rhagoda histata
Salt Bush

I have to say I'm a sucker for grey foliage. I love the beautiful contrasts that it creates with most colours. It's a lot like a bridesmaid at a wedding - it's function is to show the main colours around it, at their best.

Rhagoda is that kind of selfless plant. It's common name is Salt bush, because it grows so well in salty coastal conditions.
It's foliage looks so soft and velvety that it makes you want to take a nap amongst its leaves, but it releases an unpleasant fishy smell when you brush your hand over it.

It has been largely ignored by most people, but is quite a rewarding plant. It grows best in full sun and in well-draining soil. It is fast growing, and will reach about 1m high.
It can be trimmed into a slightly unkempt low hedge, and should be done regularly to keep it neat.

Friday, 25 July 2008

Silent Green Vandalism

A friend of mine once joked that if there were ever a nuclear explosion in South Africa, the only things that would survive would be the cockroaches and Natal Figs (Ficus natalensis).
In the right place, these beautiful trees can be the crowning glory in a garden. Birds and bats love their fruit, insects love their flowers, and a host of creatures use them as homes and hiding places. They grow easily from seeds or cuttings, and will reach a height and circumference of ±20m if they are in the right place.

They can also be a nightmare if they are left to grow in the wrong place. I have seen countless broken walls that have had a small Natal Fig left to grow in a tiny crack. The leaves and stem are often hacked back, but the roots are incessant. Before you know it they have expanded and done irreparable damage. The roots can often be found at a distance of 2-3 times the radius of the canopy, looking for water. So they should never be planted anywhere near pools or drains.


Because of their amazing roots, they are also commonly known as strangler figs. They are often found growing out of a tiny reservoir of decaying leaves in hollows of other trees, but the roots soon find their way down to the ground, and within a short space of time, they begin to surround and smother their supporting tree. Its actually a very effective way of dealing with unwanted alien trees. (Provided you have the space for a large Fig in its place.)

If you do find a little green vandal growing where it shouldn't be, try to pull the plant out by the roots (if its still young), or cut it back and apply a mixture of diesel and garlon to the cut piece. If you do manage to pull it out, they make great-looking fast-growing bonsai that are easy to look after.

Thursday, 19 June 2008

Final Day for Green With Envy Show Setup

I wasn't kidding about the rain - here's a picture taken in Port Shepstone of some of the flooding. Someone's going to have a major cleaning bill to get their car sorted out!


The nursery is beginning to bustle (after 2 days of relative quiet) - people are starting to setup their stands, the marquee is up and everyone is rushing around trying to get it all ready.

Despite the rain, we are on schedule at the moment. The plastering is all but finished, and we are starting to lay the cobbles and steps. The water feature will be next. I think I might have to make some changes to the plants that I had planned to use - there isn't enough space for what I was going to do. Will have to do some thinking...


Sunday, 8 June 2008

A Perfect Winters Day


Yesterday was one of those perfect winter days - warm enough that you could sit in the sun and feel toasty but not hot. We went for a walk in Kloof Gorge, to take some photos of the red hot pokers that were sitting proudly above the dry winter grass.

On the way back I started to notice a scattering of these Helichrysums in the veld. The flowers were already dry and silvery, but seemed to reflect the sun like little mirrors in the grass.
The flowers are probably several weeks old now, and if the veld isn't burnt too soon they'll probably look just as good for a few more weeks. (True to their common name - Everlasting)


I changed the photos to black and white to show how striking the silvery flowers really are.

The only blight on the day was discovering hundreds of tiny little red ticks the size of pin-heads on my ankles. I had to spend the next half an hour making sure they were all off me.

Friday, 6 June 2008

Indigenous Beauties : White Leonotus leonurus


Leonotus leonurus
Wild Dagga

Driving past Springside Nature Reserve, I spotted this Leonotus growing at the entrance. Its not as common as the Orange Wild Dagga but its just as beautiful.

Wednesday, 21 May 2008

Behind The Scenes - Courtyard Garden


Don't be fooled, a small garden can be just as much work as a big garden. There have been several reasons, but this project has taken nearly 6 months to complete. Thats a long time for a space that is only 3m x 3m!

This was part 3 of a bigger garden project that we had completed about a year ago. My clients had a small courtyard built onto their bedroom, to give them their own private garden. The brief was quite straightforward:
  1. A place to sit with a small table and chairs
  2. A waterfeature - along the lines of a letterbox type water feature
We discussed a few options, looked at several books and magazines, and finally settled on a basic style. It would be quite a contemporary formal garden, with a touch of an oriental feel. We would lay a white concrete floor, with white pebbles around the border.
The budget was quite tight for what was needed, but provided everything went according to plan it would be fine.

This was the blank slate:


The work progressed in stages:
1. Subsurface preparation
We laid irrigation pipes and electrical conduit. The irrigation for the entire garden would be run from the unit on the wall in the left-hand corner.
The irrigation, lights and pumps would all need electricity. This created quite a few boxes in the corner that would need to be screened, but still with easy access to plugs and controls.

2. Adjusting of walls and steps
The existing step was too high, and was subsequently chipped away and re-built. Also, the pillar in the center of the facing wall would need to be removed for the water feature that would be installed in the center.

3. Laying the concrete base
Once the builders had finished in this area, we positioned boards around the edges of the soon-to-be concrete slab, and began pouring our concrete. This was then roughly levelled, and left for a few days to harden, before the boards were removed.


4. Building the water feature
The water feature wall was built from brick. The stainless steel chute which would form the sheet of water, had been made up a week before. This had to be installed perfectly level. Even if it is slightly out, the sheet of water coming out would very obviously be skew. The pipes were all joined up, and then connected to the reservoir below.
The test run with a hose pipe connected into the system is always an anxious moment, but the water feature worked according to plan. The top of the wall was then closed up, and plastered.


5. Screeding the surface
We used a combination of white cement and very light sand, so that the concrete screed would be as close to white as possible. Because of the amount of time needed to dry, and the fact that this was our rainy season, we had to wait until the weather man was predicting a dry couple of days. The first chance we got, we carefully screeded the whole surface, and left it over the weekend to dry.
Unfortunately, the final result was a little cloudy, and not entirely white. It did look quite a nice natural sandstone colour, but wouldn't give the necessary final white look that we were looking for.
We chipped it all up, and re-laid the screed. This time fortunately, the colour was a lot more even, so we let it harden for about 10 days before anyone was allowed to walk on it - not that the dogs agreed to that though!

6. Planting
Getting the planting right would be most important, in that I wanted to soften all the walls without closing down the space. I installed trellises on the sides to blur the boundaries of the courtyard a little, and in so doing, make it seem slightly bigger than it is.
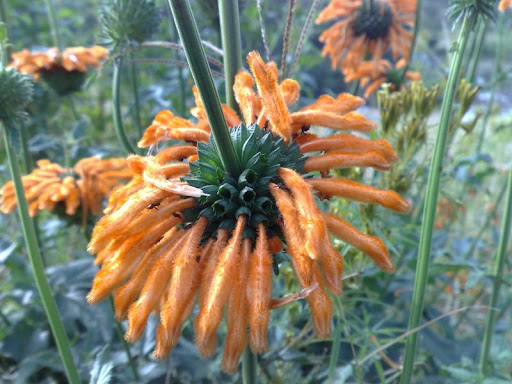
I had 3 plants in mind from the start - Bamboo, Arum and Maple. These plants all suited the contemporary, slightly oriental feel, that I wanted to create. Alongside these, I planted Bergenia, Imperata Cylindrica (Red Baron Grass), Tulbaghia and Gardenia. I also planted Jasmine (Trachelospermum) to climb the trellis. Both the Gardenia and Jasmine have beautiful scents.
I planted the Maple in 2 pots on either side of the step - this would also help screen the electricity and irrigation boxes in the corner.


I wanted to add some statues into the courtyard, that wouldn't be too overpowering, and would suit the overall feel. I had seen these dog statues, right in the beginning of the project, which I thought would be perfect, showed a photo to my client, and she agreed. We placed these on pedestals on either side looking into the center of the garden.


After a few weeks, my client called to say that she was a bit disappointed that the concrete would go so dark when it was wet (which was most of the time due to the regular rain that we were having). After a bit of investigation, I discovered a sealer that could be applied to the concrete which would prevent this from happening. I was given the go ahead, and we rolled it onto the surface. It did lose some of the brightness, but at least the colour would remain constant regardless of whether the concrete was wet or dry.
A few days later, white patches began forming on the surface after any rain - the company which supplied the sealer were at a loss as to why this would happen, and suggested that I try waterproofing the surface with an epoxy. We took their advice only to find that it still appeared under the surface. It has improved slightly after a few weeks, but is still there.

Apart from one or two hiccups, the finished garden has turned out exactly how I had planned - the water feature wall was painted a burnt red to tie in with the bedrooms colours. This made all the difference in finishing off the garden.

Saturday, 3 May 2008

Indigenous Beauties : Leonotus leonurus


Leonotus leonurus
Wild Dagga

This is really an outstanding plant. It is one of the most noticeable plants during a dry winter, bringing much needed pockets of colour to the rocky grasslands in which it is naturally found.

The flowers are usually bright, fountains of orange, but can be found in apricot and even white. Sunbirds love the nectar found in these flowers.

I've found it flowering throughout autumn and winter.

After it is finished flowering it should be cut right back, and will reach around 2m by the next flowering season. It seeds itself very easily if left.

It grows in well-draining loamy soil. It should be composted, and watered well in the summer, but needs little attention in winter.

It should be planted amongst wild grass, or at the back of a flower bed to give height and colour. It is best to plant with an evergreen plant so that when it is cut back drastically every year, the gap is not as sorely noticed.

Monday, 31 March 2008

Indigenous Beauties : Tabernaemontana elegans


Tabernaemontana elegans
Toad Tree

This small to medium sized tree is perfect for a small garden. It reaches about 3-8m in height, with a single roughly fissured corky trunk. Its evergreen foliage is always a rich glossy green colour. It bears clusters of white star shaped flowers from the start of spring to the end of summer. The fruit is usually in pairs, with a look and texture similar to a toads skin.

It will grow in semi shade to full sun, and requires moderate water in well draining soil. It is frost hardy to an extent.

I love this tree for so many reasons. You can't go wrong, whether you choose it for its small size, foliage that always looks amazing, its pretty flowers or unusual fruit and bark.


Monday, 17 March 2008

How To Have A Debt Free Garden

Are you in debt with your garden? A post at Garden Wise Guy recently, got me thinking about how often I see gardens with plants planted in the wrong places. Like bad debt, these plants get out of control, causing damage and sapping your energy. The result is usually a completely discouraged gardener.
Decide how in debt you are by asking yourself these questions:
  1. Are you struggling to keep a plant/your garden/lawn under control - as fast as you trim it, its grown back already?
  2. Is a tree or plant getting bigger by the day, and will soon be causing damage to walls, drains, paths etc. but will cost too much to remove?
  3. Are you continually having to cut back plants that want to get bigger than the space allows?
  4. Have you got thorny plants too close to a path, that constantly need cutting back to prevent injury?
  5. Are you feeling overwhelmed by the amount of work needed in your garden?
If you answered yes to most of these questions, then chances are, you're in debt with your garden, and probably see your garden as a chore.

A garden is a lot like money - if planned wisely, it can grow into something of great value. But unfortunately like most of us with bad money habits, we don't invest our plants in the right place. Sometimes the problem becomes so big that we find ourselves in a hole that we can't get out of.

Continuing the financial analogy, the best way to deal with these problems is to:
  • Start with the smallest thing you can manage - get that under control, and it will give you energy for the bigger stuff.
  • Identify potential problems early, and get a plan into place to deal with them.
Obviously, prevention is better than cure. Read up, or ask your local nursery about the plant you are about to plant. Find out how big it gets, or what its roots will do in a few years time.
Rather than continually having to trim it back, plant something that will get to the height/size that you want it to.
If you have huge areas of lawn that require constant maintenance, reduce your lawn size, or even let an area of it grow wild and plant some wild flowers into it.

The most common problem plants that I see are Fig trees, Palm Trees, Wild Bananas, and Pandanus. These all start off quite innocently small and attractive, but get out of hand so quickly. Kikuyu grass can also be a nightmare to try and keep under control.

The Pandanus in this photo started off as a small spiralling little plant that is now threatening to move across the road. (You can't see him, but on the other side of the plant is a gardener trying his best to cut it back with a small bush knife!)


Get out of debt, and both you and your plant/garden will be a lot happier for it.

Sunday, 16 March 2008

Indigenous Beauties : Ruttyruspolia 'Phyllis Van Heerden'


Ruttyruspolia 'Phyllis Van Heerden'

I feel a little apologetic for this perennially beautiful plant - that no-one has taken the care to give it a common name. Its Latin name is a bit of a mouthful, and usually mispronounced or misspelled.

It is a shrub that reaches 1-2m in height, and stays quite compact. If planted in the shade of taller plants - it will go scrambling for light.
It bears clusters of star-shaped warm pink flowers for most of summer. It should be pruned back well after it has finished flowering. It loves a sunny spot, with well draining soil.

It doesn't enjoy frosty conditions. Interestingly enough, it is a hybrid of 2 different genera (Ruttya and Ruspolia).

Any ideas for a common name?


Saturday, 8 March 2008

Behind The Scenes

I've just finished a garden for a young family, that wanted to make full use of the garden around them. The area was initially 2 seperate gardens that had the dividing fence taken down and made into a single large garden with a pool and play area for the children.

One side had already been planted-up quite well, using almost entirely indigenous plants, while the other side consisted of a flat grassy area, and a steep bank which flanked the house, spotted with a hodge-podge of plants.

When looking at the garden as a whole, I realised that the steep bank was probably the biggest area in the garden. It was almost un-usable because of its steepness - apart from the kids using it as a bit of a natural slide.

The soil was poor and sandy, and as a result the grass was only just covering the bank. Over the last decade or so the topsoil was slowly washing down the bank. The effects of which could be seen by the soil level on the side of the house which had slowly risen up to the tops of the drains.

My brief was simple: to landscape the garden and especially the bank, keeping the children in mind.

My first steps were...well...steps. After climbing the bank, I realised that the top of the bank was a really great place to look down on the rest of the garden and surrounds (in the shade of a wild banana). Getting to the top was less than appealing though!

To make use of the view and bank, I would have to make it easier to get to the top. Straight steps would have been the simplest to construct, but wouldn't have been very enticing, and may also cause erosion issues. I decided a gentle meandering pathway would also be the least strenuous and would create a more interesting journey on the way up.

(I know I'm making this mole-hill sound like a mountain, but people by nature need to have things made as simple, easy and attractive as possible for them to make regular use of them)

After chatting with my client we decided to plant the sunniest part of the bank with wild grasses that would hold-up well with children running up and sliding down them. (I'm also trying to use as much wild grasses as possible - they are beautiful all year round, as well as bringing birds and other animals into the garden as well!)

Work began quickly, with the majority of the plants and grass on the bank dug out and removed or just cut back. We cut back some plants to ground level, on the steepest part of the bank so that the roots would still hold the bank in any heavy rain.

As it turns out, it was a good thing too. After getting the levels right, saturating the soil with copious amounts of compost, we had the first of several December deluges. The rains ran straight down the bank, only to form a small dam against the compost pile, which then proceeded to wash into the now muddy new pool.

The next step was to retain the sides of the pathway, using timber posts sunk, and concreted into the ground. The bank on either side of the pathway was planted up with fast-growing groundcovers and grasses. These would in the shortest possible time, hold the soil in place and look beautiful all year round.

While the planting was progressing I began to see the potential for a tree house in the young Fig on the far side of the bank. The fig itself was too small still for a proper tree-house, but a deck that was built up to, or supported by the fig would be a real inviting place for kids or adults on a hot summer day. I made the suggestion to my clients, who loved the idea, and construction began a short while after.

The 'final' garden is now complete. It will be a while before the garden looks at its best, but it has already begun to blossom. It may need a bit of tweaking in a few months time, with a plant added here or there, but as the saying goes 'a garden is never finished'.


A planting plan of the garden can be found here.

Sunday, 2 March 2008

Indigenous Beauties : Asystasia gangetica


Asystasia gangetica
Fairy Bells/Creeping Foxglove

Asystasia is a thrifty little plant - doing much with little. It is often found growing in coastal dune forest with very little nutrients, sandy soil and often low light. When given any kind of care - water, light or food, it will repay you with fast growth and pretty little white bell-shaped flowers.

Asystasia is a great little groundcover when you are needing to stabilise a bank, or hold soil in place. It will grow well in sun or shade, although if grown in full sun with medium amounts of water it will tend to go yellow temporarily. It attracts butterflies and has a pleasant fragrance.

It can be grown easily from cuttings, and will spread out to about 60cm wide, and 30-40cm high.

Garden To Do List : Autumn

Trees & shrubs
  • Lightly cut back hydrangeas, helichrysum
  • Make sure that late-summer flowering shrubs are getting adequate water (once a week)
  • Prune back Poinsettias to keep them from getting leggy
  • Trim hedges
  • This is a good time to plant (it's getting cooler and the plants won't need as much looking after)
Lawns
  • Fertilise lawn areas with a high nitrogen fertiliser (4:1:1 or LAN.) Water well afterwards to prevent chemical burn)
  • Frequent light mowing is best
  • Water well, once a week (or more if extremely hot/dry)
Roses
  • Water well, regularly
  • Mulch with a good compost
  • Feed with 3:1:5 fertiliser
  • Keep an eye out for blackspot, powdery mildew or fungus (especially SRA)
Perennials & Groundcovers
  • Water well, once a week (particularly WRA)
  • Trim any untidy growth
  • Divide perennials such as Iris, Dianella, Bulbine
  • Cut Felicias and Salvia leucantha back well
Annuals
  • Keep summer-flowering annuals well watered (particularly WRA)
  • Petunias can begin being planted out (they don't like a lot of water on their flowers)
(SRA) Summer Rainfall Areas
(WRA) Winter Rainfall Areas

Home Made Pest Control Solution(s)

I'm really not a big fan of pesticides or chemicals. Actually, that's putting it mildly...I hate pesticides. They are almost always ...